
Narrogin Primary School kids are creative legends. Last August I got to hang out with 20 of them, making a picture book in a day.
Impossible! I hear you cry. What form of sorcery is this? It cannot be done! Well, we did do it, and here’s how.
Step 1: text
Rather than a full-blown picture book narrative, I wanted to create a cumulative text (where text is repeated and added to) or subtractive text (where text is repeated but subtracted from). These two forms have very clear structures making them quick and easy to write, particularly with a group.
I went in with an idea for a subtractive text about 10 sheep. Narrogin is in wheat and sheep country so I thought the kids might go for it; sheep are really easy to draw too.
My template looked like this:
10 _____ Sheep
10 ______ sheep
___________ -ine,
1 ____________
and then there were 9.
9 ______ sheep___________ -ate,
1 ____________
and then there were 8 …
The students and I spent about an hour brainstorming and filling in the gaps. We came up with this:
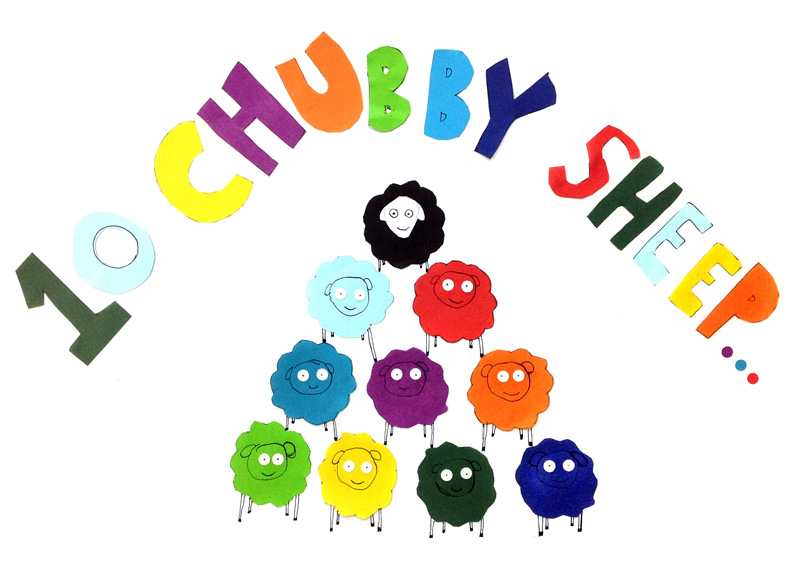
10 Chubby Sheep
10 chubby sheep
tried to cut some pine,
1 shouted TIMBER
and then there were 9.
9 chubby sheeptried to have a skate,
1 went too fast
and then there were 8 …
Step 2: planning
Once we had a complete text we split it into pages, with a student or a group of students taking responsibility for the accompanying illustration.
Part of this process was deciding on 10 different colours for the sheep, so that we could keep the characters consistent throughout the book.

I suggested using coloured paper for the illustrations; this way we could keep the style consistent throughout.
We came up with a basic sheep design using a cloud shape cut from the coloured paper. We drew the head and legs with black fineliner and used small circles of white paper for the eyes (prepared using a hole punch).

Step 3: illustrations
First the students did a draft illustration with pencil.

Then they started to cut paper and stick it on the page.

Before you knew it, we had all the illustrations completed. Some students who finished early did the cover page. All sorted!
Step 4: putting it all together
I didn’t have access to my scanner so I took photos of the illustrations with my iPhone. My photos weren’t great because I couldn’t find a sunny spot with no wind (the illustrations were blowing all over the place). Luckily I could edit the brightness and contrast in Photoshop.
I used InDesign software to put the pictures and text together. If you’ve got Windows you could use Microsoft Publisher instead.
Discussing the ins and outs of the software would take up an entire blog, so I won’t do that here. I’ll just show you the basic layout: we had a cover page then text and illustrations on facing pages.

The writing and illustration process took about 4-5 hours, and I spent another 2 hours or so cleaning up the images and compiling the book.
Big thanks to Narrogin Regional Library for organising the visit, Narrogin Primary School for having me, and to the 20 students who made the book!
Here are some more pics from the book.


I love this! Lucky kids. Well done, James.
Cheers Kaye! It was a lot of fun. Hopefully I get to do some more of these with schools.
I can see this! It’s such a brilliant approach it couldn’t possibly fail to be heaps of fun.
Cheers Sandy. This approach is all Alison Lester; she ran some workshops with our SCBWI Australia West group last year, explaining how she runs book making workshops in remote communities, and it’s essentially like this. Though often she goes a step further and has the group of kids develop full narratives together, focusing on the place they live. The books she has made with kids are amazing
Love it!